Steps for Creating a SharePoint Portal Site
Creating application pools
To create the Main Portal application pool
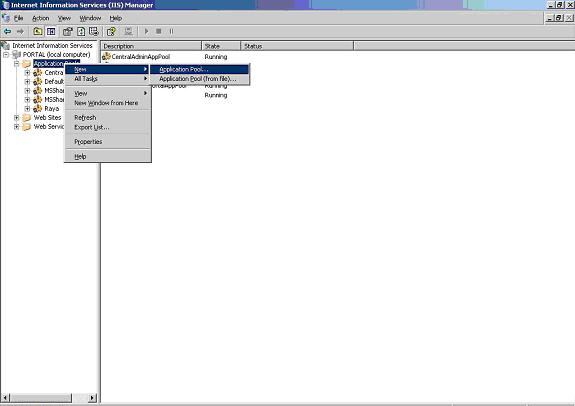
1- Open the Internet Information Services (IIS) administration console. Right-click the Application Pools folder, point to New, and then click Application Pool.
See Pic 1
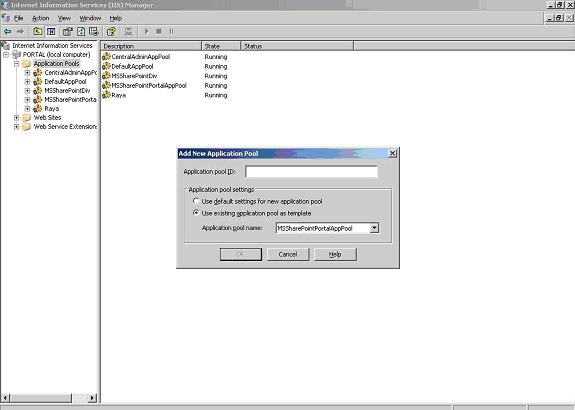
2- Name the application pool (MSSharePointCorpAppPool), using the Application Pool worksheet as a reference. Enter the name for the corporate application pool.
See Pic 2
3- Click Use existing application pool as template in the Application Pool Settings section, and then click MSSharePointPortalAppPool in the drop-down list.
Creating the Portal Virtual Servers
In this section will create and configure IIS Virtual Servers by setting the following parameters for the portal sites that will be created:
· Virtual Web name
· Virtual Web IP address
· Application pool
· Virtual Web-file system directory name and location
To create the virtual servers for a new portal
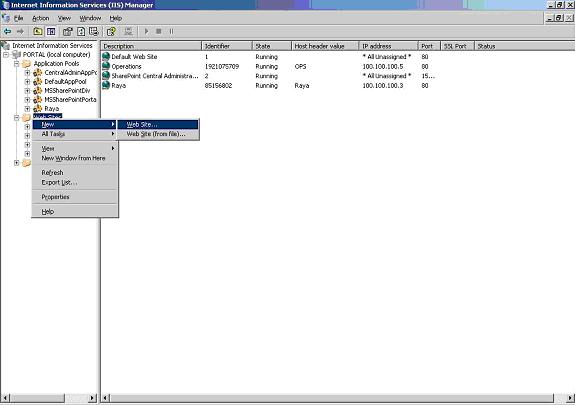
1- Right-click the Web Sites container, point to New, and then click Web site.
See Pic 3
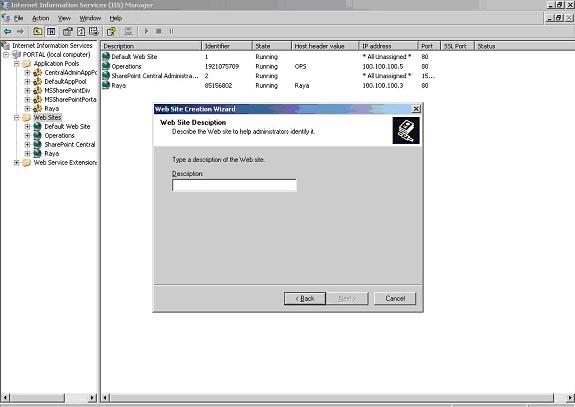
2- Follow the directions to start the wizard. In the Web Site Description page, enter the description, and then click Next.
See Pic 4
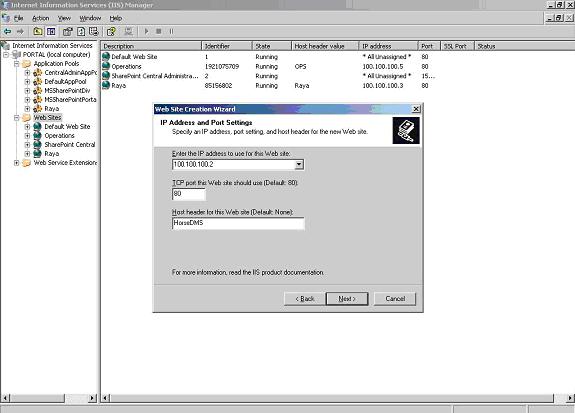
3- On the IP Address and Port Settings page, click the IP address in the Enter the IP address to use for this Web site drop-down box. Leave the default TCP port of 80 in the TCP port this Web site should use (Default 80) box. In the host header text box, enter the host header. Make sure to type only the hostname, not "http://". Click Next.
See Pic 5
4- In the Web Site Home Directory page, enter the path to the folders that contain the Web site for the virtual server (C:\Inetpub\portalroot\Portal Site Name)(this can be any physical file folder). Clear the Allow anonymous access check box, and then click Next.
See Pic 6
5- On the Web Site Access Permission page, verify that only Read and Run scripts (such as Active Server Pages [ASP]) are selected, and then click Next.
See Pic 7
6- Right-click the new Web site, and then click Properties. Click the Home Directory tab, and then click the appropriate application pool on the Application pool drop-down menu.
7- If you want your users to be able to access this site without using the fully qualified domain name, you must do the following:
1. Click the Web Site tab.
2. Click Advanced.
3. Click Add.
4. Type the IP Address of the NLB cluster.
5. Select Port 80.
6. Type the server name (not fully qualified).
8- Click OK, and then click OK again to close.